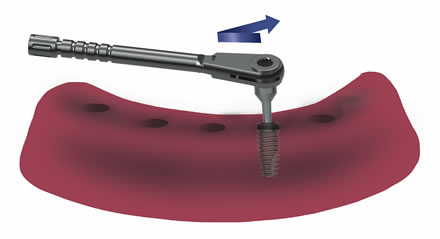
General information concerning the methods of OCTO implant application are described as follows:
Application procedure
The standard pieces located within the OCTO implant package:
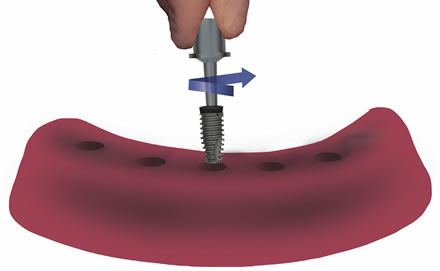
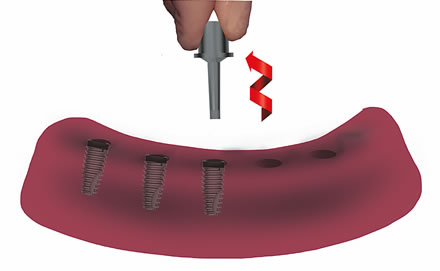
- Plastic implant-carrier: The plastic carrier manufactured in the tooth color is tightly inserted into the morse taper bed. Implant is taken out from its box by holding the plastic carrier with a sterile glove without powder.How to use the plastic implant-carrier: Hold the head of the plastic carrier with two fingers and rotate in to the bone bed until having some resistant to tork which should be enough for the initial placement. Pull out the plastic carrier from its morse taper bed. Maybe used to fabricate a temporary crown for a single implant, all of these characteristics belong to the OCTO implant system.
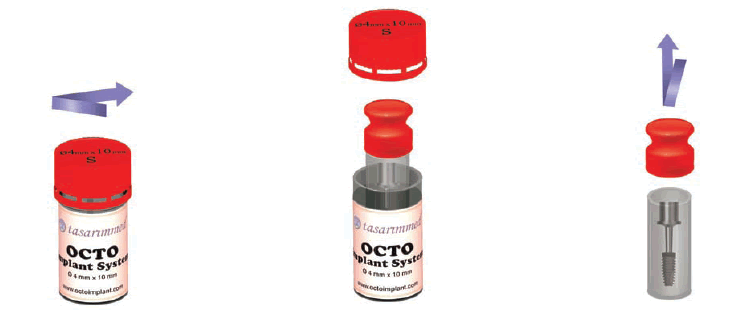
- Healing abutment: It is taken out from the inside of the cover of the implant box by rotating slowly.How to use the healing abutment: Healing abutments in different heights ensure to shape the gingiva, to keep away the implant from the occlusal forces and to be able to perform single-phase surgery. The OCTO implants are manufactured for the purpose of single-phase surgery: However, if required they can be left under the soft tissue by using healing abutment with 0.5-cm height which is located at the cover of the implant box.
The insertion of the OCTO implants
- The sterile inner box is left on a sterile area by opening the outer box of the OCTO implant. The surgeon opens the cover of the inner box and holds the plastic implant-carrier with sterile gloves and then, ensures the initial placement of the implant into the osteotomy bed.
- For final implant placement, 2-mm hex adapter is used for implants with 3.5-mm diameter and 4.5-mm diameter
- 2.5-mm hex adapter is used for implants with 5-mm diameter and 6-mm diameter.
- The implant is inserted until its final position by rotating clockwise with a maximum 60-Newton per centimeter torque by means of a torque adapter plugged on to the tip of a ratchet.
Warning: The deformations that can take place depending on the excessive forces when torque wrench is used may cause implant body failure. Therefore, the ratchet torque value should not exceed 60 Newton per centimeter.
Healing cap and abutment insertion
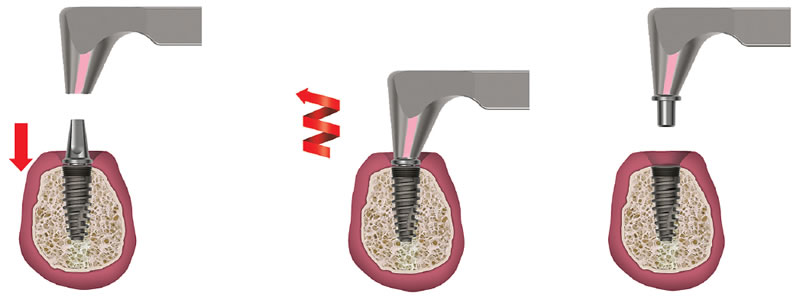
Healing caps and abutments are securely placed using plier which is provided in the surgical set.
Tap 1 or 2 times on the healing cap to fix it in to the implant
Tap perpendicularly 3 to 6 times on the abutment to fix it in to the implant
After fixing abutments, immediate loading can be performed by doing temporary restoration (See the immediate loading conditions).
Although OCTO implants are designed for single-stage surgery, they can be used in two stage surgery when desired. In order to establish the transfer of implant positions to laboratory model, the complete jaw impression is taken via an elastomeric material. Straight OCTO abutments and plastic impression caps (see page 20)”” are used for impression transfer.
Healing time of the OCTO implant
Take out the healing cap from the inner cover of the box and fix it on the implant by slightly tapping on perpendicularly 1 or 2 times. Suture the soft tissue over the healing cap to completely submerged or from its boundaries to let the healing cap uncovered.
Conventional Healing Time: Conventionally, before loading the implants, it is necessary to wait for 2-3 months for mandibula and for 3-4 months for maxilla according to the characteristics of the periimplant bone.
Early (immediate) Loading: OCTO implants can be loaded in the selected cases immediately in the following conditions when at least 35-Newton per centimeter torque is obtained.
- When removable implant-supported prostheses are fabricated where four implants are splinted in the interforaminal region or where two ball attachments are used.
- When at least seven implants with 4/10-mm dimensions are splinted in the restoration that will be performed to the complete edentulous maxilla and when a 30 to 35-Newton per centimeter insertion torque is obtained in Type 1, Type 2 or Type 2-3 bone structure.
- Implant number should be maximum in Type 3 and Type 4 bone structure and immediate loading should be avoided in Type 4 bone. In critical conditions, the responsibility of the immediate loading belongs to the dentist.
Maintenance after surgery
- The treatment duration after surgery depends on the clinical situation of the patient such as bone quality and amount of the primary stability, prosthetic loading status etc. Thus, the patient should be monitored carefully. It is important to remind the patient not to apply excessive masticatory force and pressure to the region where surgical procedure is performed during the implant recovery.
- The identity label and identity number within the product box should be stuck on the patient card or on the panoramic film in a way that it can be followed in the future.
- The dentist should check the osseointegration process with radiography and clinical examination accordingly he or she should begin to the second-stage surgical procedure and prosthetic treatment. If immediate loading is applied without waiting the osseointegration process, in that case the implant stability should be monitored until the osseointegration is ensured.
